
Guide · chapter 04 / 08
How to list a product and optimize your offer on Amazon
Daniel Pawłowski · Amazonway · 38 min read
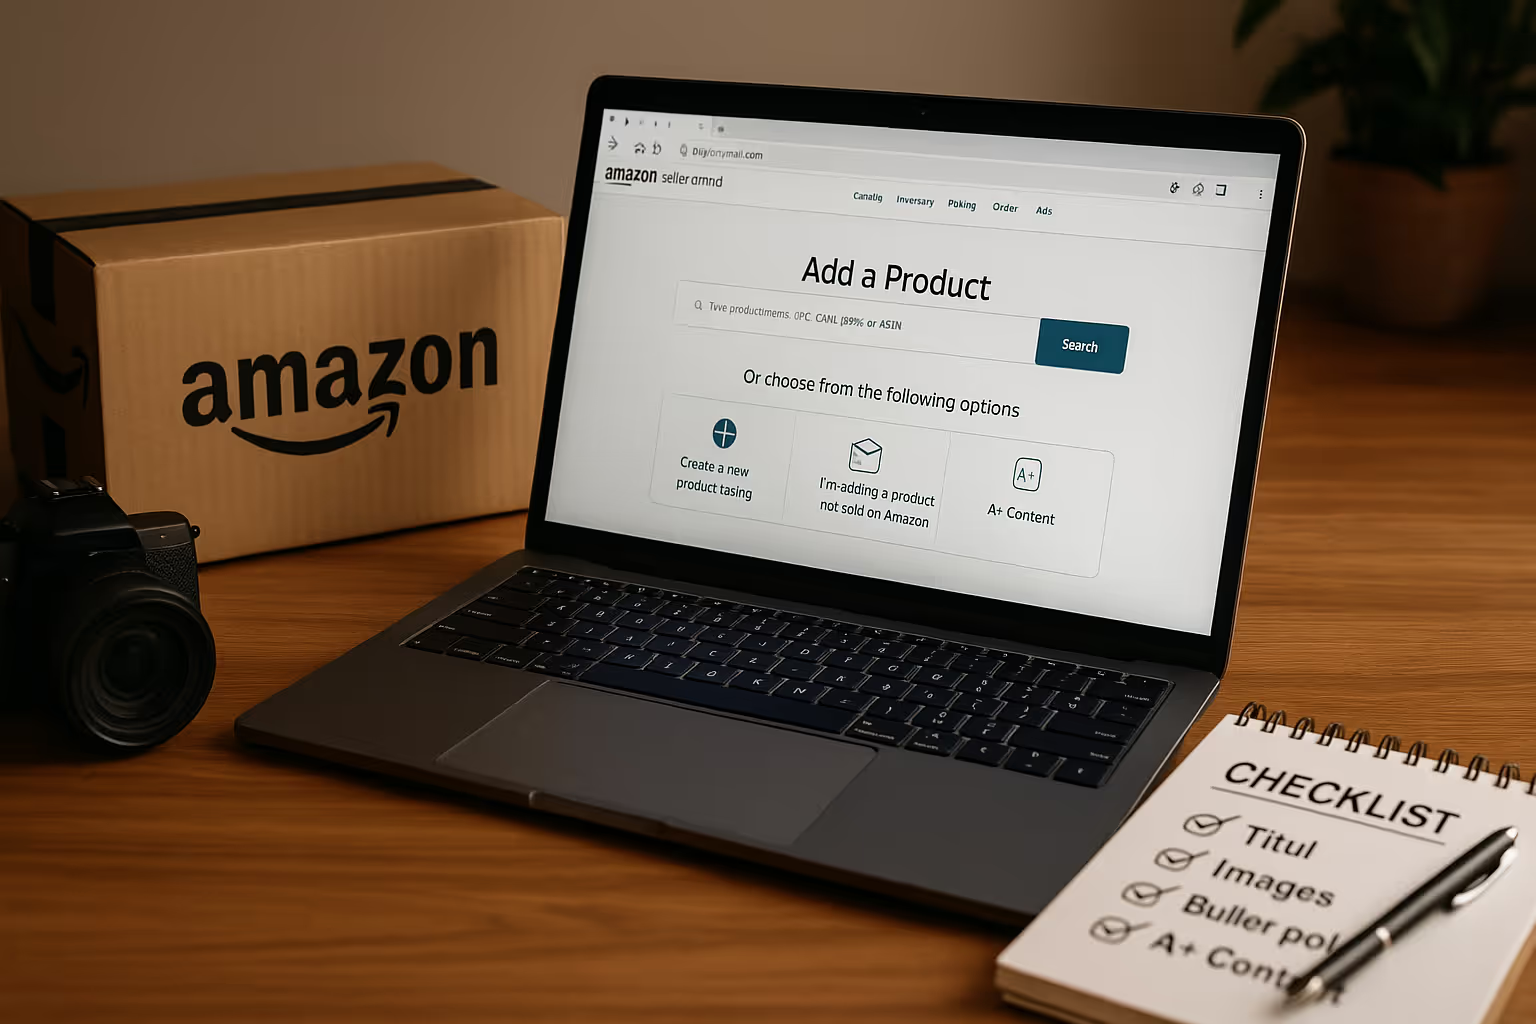
Why the listing is the most important element of selling
On Amazon it is not the one with the lowest price who wins. The winner is the one who can create an offer that sells. The listing, i.e. the product page, is the centre of the whole shopping experience: the moment when the customer decides whether to buy or not.
You can have a great product and invest in advertising and PPC campaigns, but if the listing is weak, traffic will not turn into sales. That is why Amazon (and its A9 algorithm) rewards offers that not only generate clicks but also convert effectively.
Amazon looks at data, not emotions
The Amazon A9 algorithm analyses everything:
- CTR (Click-Through Rate): how often customers click your offer after seeing it in the results;
- CR (Conversion Rate): how often they make a purchase after entering the product page;
- Buy Box share: how often your offer is the one the customer sees as the “default” to buy.
The better optimized the listing, the higher these metrics. And that means better visibility, more traffic and higher sales.
How a good listing differs from an average one
An average listing looks correct: it has a title, a few photos and a short description. A good listing sells a story, not just a product. It contains a clear message, matched language, readable benefits and visual consistency. The customer does not have to guess what it is, whether it works or whether it is worth it.
💡 A good listing:
- has a thought-through title that immediately says what you are buying,
- shows real photos and benefits, not just packshots,
- explains why it is worth it, not just “what it is”,
- answers typical questions before the customer even asks them,
- contains keywords matching the search intent,
- is consistent with the brand: in the description, tone and graphics.
The listing is your sales landing page
The listing is not just a “product page”: it is your landing page within the Amazon ecosystem. This is where you build the first impression, convey value and remove buying barriers. If you look at the product page as a landing page, you immediately approach creating it differently:
- the headline (title) should catch attention and answer the intent,
- the photos should sell emotion and the context of use,
- the bullet points and description should tell a story,
- A+ Content should reinforce trust and highlight the brand.
Amazon does not let you build a whole store the way Shopify does, but it gives you something that can work just as well: one page that can sell to thousands of customers a day.
👉 That is why everything starts with the listing. It decides whether your product gets noticed or disappears among thousands of others. And a well-prepared listing is an investment that pays off every day: in clicks, purchases and your brand’s position in search results.
How to list a product step by step
Listing a product on Amazon may seem complicated at first: dozens of fields, categories, parameters, photos, variants… But in reality it is a process you can organise logically and go through calmly, step by step.
Everything starts in Seller Central, the seller panel that is your command centre. This is where you manage offers, orders, inventory, ads and invoices.
Step 1: Go to “Add a Product”
After logging in to Seller Central, from the top menu choose “Inventory” → “Add a Product”. At this point Amazon will ask you whether you:
- want to add a new product (i.e. create a new ASIN),
- or join an existing product (i.e. sell the same thing as someone else).
🔹 If you have a unique product, your own brand or manufacturer, you choose Create a new listing. 🔹 If you sell something already in the Amazon catalogue (e.g. a popular power tool or a book), you can join an existing ASIN, in which case you do not have to create a new product page.
Step 2: Choose the product category
This is a very important stage, because the wrong category lowers visibility and can cause blocks. Choose the category as precisely as possible, ideally the one where customers actually search for your product. If in doubt, type the product name into Amazon search and see which categories appear for competitors.
Step 3: Prepare the product data
Before you start filling in the form, prepare:
- the EAN / GTIN / UPC number: Amazon requires a product identifier (unless you have exclusivity and applied for a GTIN exemption),
- the product title: short, specific, containing keywords,
- the description and bullet points,
- photos in the right resolution (minimum 1000 px, ideally 2000 px on the longer side),
- weight, dimensions, variants (colour, size, etc.),
- the price and quantity,
- logistics information (FBA / FBM).
💡 Pro tip: before you enter data manually, it pays to prepare a simple Excel file with the most important fields: it will make scaling offers easier later.
Step 4: Complete the “Vital Info” section
Here you define the basic elements of your listing:
- Product Name (title): max 200 characters, no flashy embellishments, ideally: Brand + Product + Key features + Variant (e.g. size, colour).
- Brand Name: if you have a registered brand (Brand Registry), enter it exactly as it was submitted.
- Manufacturer: if you are the manufacturer, you can enter your company.
- Product ID: the EAN or UPC number.
Step 5: Add “Product Description” and “Key Product Features”
These sections create the content of your listing.
- Key Product Features (5 bullet points): short, concrete points showing benefits, not just features. 👉 Example: “✅ Clean composition: 100% natural ingredients, no artificial additives.” “💧 Perfect for travel: the compact packaging fits in any bag.”
- Product Description: here you can develop the product’s story, add context and emotion, and place additional keywords (Amazon indexes them).
Step 6: Add photos
Photos are a key conversion element. Amazon requires:
- 1 main photo (white background, the whole product visible in the frame),
- 6–8 additional photos: lifestyle, details, context of use, graphics with dimensions. Good photos can raise CTR by as much as 30–50%. It also pays to add short infographics showing why your product is better.
Step 7: Backend Keywords: the secret keywords
In this section you can add phrases that are not visible to customers but help Amazon’s algorithm understand what your product is about. Enter:
- synonyms,
- misspellings,
- local versions of names (e.g. “travel backpack” and “cabin backpack”).
Do not repeat words from the title or bullets: Amazon treats them as duplicates.
Step 8: Set the price, quantity and logistics
Finally, specify:
- the selling price,
- the number of units available,
- the fulfilment model (FBA or FBM).
If you choose FBA, Amazon will guide you through the process of shipping stock to the warehouse. If FBM, you set your own delivery costs and times.
Step 9: Publish the offer and move to optimization
After saving the data, Amazon will check the information for correctness. New offers usually appear in the catalogue within a few minutes, but sometimes the verification process takes longer (e.g. in restricted categories such as cosmetics, food or electronics).
After publishing, it pays to monitor the listing right away: check how it displays, whether the photos are sharp and whether the text has not been cut off.
👉 Remember: listing the product itself is only half the way. The other half is offer optimization: matching it to the Amazon algorithm (A9 SEO), customer needs and conversion.
In the next part we look at how to build the perfect listing: one that not only looks professional but really sells.
How to add multiple products at once (Flat File / Bulk Upload)
If you manage a larger catalogue — dozens or perhaps hundreds of products — adding each offer manually in Seller Central quickly becomes tedious. Fortunately, Amazon gives sellers a professional tool for listing many products at once, in an orderly way and without clicking for hours. This is the so-called flat file, an Excel spreadsheet template (Inventory File Template) that you can fill in and upload to the system in one move.
What is a flat file?
A flat file is an Excel spreadsheet (.xlsx) or a text file (.txt) where you fill in product data in columns. Each row is one product, with its name, description, price, EAN, photos, category, keywords and other information. It is the same set of data you normally enter manually when adding a product, but now you have it in one place, ready for bulk upload.
With a flat file you can:
- add many offers at once,
- quickly update prices, descriptions, photos or quantities,
- prepare listings offline before publishing them,
- keep a backup of all offers (ideal for assortment changes or migration).
Step 1: Download the template
Go to Seller Central → Inventory → Add Products via Upload. Click “Download an Inventory File”, then choose the appropriate product category (e.g. Home & Kitchen, Tools, Beauty).
Amazon will generate a dedicated .xlsx file with columns matched to that category. Each category has its own set of fields: electronics require technical data, while clothing requires sizes and colour variants.
Step 2: Read the instructions in the file
Every flat file contains several sheets:
- Instructions: an explanation of how to fill in the fields, examples and rules,
- Template: the actual sheet you enter data into,
- Valid Values: a list of accepted values (e.g. “Red”, “Blue”, “Cotton”, “Plastic”).
📌 It pays to read at least the first pages of the instructions: one error in a column can block the whole file.
Step 3: Fill in the Template sheet
Focus on the columns marked as Required. The typical fields you must fill in are:
- Product Type: the product type (e.g. kitchen_towel, phone_case),
- Item Name: the product title,
- Brand Name: the brand name,
- Product ID: the EAN or UPC,
- Standard Price: the price,
- Quantity: the amount,
- Product Description: the description,
- Bullet Points (1–5): the key features.
💡 Pro tip: use Excel formulas to combine data automatically, e.g. to generate a title from the “Brand + Model + Features” columns. It is a huge time saver.
Step 4: Save the file
Save the sheet in one of two formats:
- .xlsx: the standard Excel file,
- Text (Tab delimited): recommended for large catalogues (hundreds of SKUs), because it processes faster.
Do not change the names of sheets or columns: Amazon only recognises the file’s original structure.
Step 5: Upload the file to Seller Central
Go back to Inventory → Add Products via Upload → Upload your Inventory File. Select the prepared file and click “Upload”. After a few minutes Amazon will show the import status in the Monitor Upload Status tab.
If the system detects errors, download the report: Download Processing Report, where you will find exact information about which columns need fixing.
Step 6: Check and fix any errors
The Processing Report is your best friend. You will find messages there such as:
- “Invalid value for field Brand Name”: an incorrect value,
- “Missing required attribute Product ID”: no EAN/UPC,
- “Invalid variation theme”: a wrong variant configuration.
Fix the file, save a new version and upload it again.
Practical tips
✅ Do not change column names: Amazon will not recognise the file if you delete or change the headers. ✅ Fill in only the necessary fields: empty columns are fine if they are not marked as “Required”. ✅ Keep a working copy: before each upload save a separate version of the file (e.g. listing_v2.xlsx). ✅ Use the right template for the category: each has different rules and fields. ✅ The flat file also works for updating offers: e.g. changing prices, titles, photos or descriptions.
When a flat file really pays off
- You have a large product catalogue (over 50 SKUs).
- You sell products in many variants (e.g. size, colour).
- You are migrating from your own eCommerce store or another platform.
- You create listings offline and want to upload them only after verification.
- You work in a team: it is easier to share data with marketing or logistics.
Flat file = full control over the offer
A well-prepared flat file is not just a technical shortcut. It is a tool that lets you:
- keep descriptions and titles consistent across products,
- minimise errors from manual data entry,
- update seasonal offers faster,
- and build your own, orderly listing archive.
How AI can help create a flat file and add products in bulk
If the thought of filling in hundreds of rows in Excel gives you a headache, relax: you do not have to do it by hand. More and more sellers use AI tools that can not only generate descriptions and titles, but also automatically fill in the whole flat file based on simple inputs: the product name, brand, category and a few technical parameters.
All you need is a basic sheet with SKU names and EANs, and AI can:
- create complete titles and bullet points optimized for Amazon SEO,
- suggest keywords for each offer,
- automatically assign categories and product type,
- generate a ready CSV or XLSX file you can upload straight to Seller Central.
In practice it works like this:
- You paste the product list into a tool (e.g. ChatGPT or GPT for Sheets).
- AI analyses the data and creates descriptions and titles following Amazon’s rules.
- The system returns a ready file in flat file structure, preserving the column names, fields and formatting.
💡 Example tools that can help:
- ChatGPT — for generating descriptions, titles and bullets.
- GPT for Sheets & Docs — AI combined with Google Sheets, ideal for filling columns in bulk.
- Helium 10 — for keyword research and competitor listing analysis.
- DeepL Write — for natural-style offer translations if you sell in several EU countries.
With such solutions, preparing a file that previously took a few hours can now be done in a dozen or so minutes, and most importantly, without formatting errors or missing fields.
Hundreds of SKUs to upload at once?
With one product a flat file is an hour of work. With a few hundred it turns into data mapping, variations and fixing validation errors row by row. That is the part we take on within listing optimization.
Amazon SEO optimization (A9)
If you want your product to be visible on Amazon, you have to learn to speak the search engine’s language. At first glance it may seem enough to just “drop in keywords”, but Amazon is not Google. Here the algorithm (A9, and in its newer version A10) does not look for the most popular content, only for content that leads to sales.
That is why optimization on Amazon combines two elements: relevance (does your product answer the buyer’s query) and performance (does the offer actually sell). Amazon analyses everything: how often someone clicked your offer (CTR), how many visitors actually bought the product (CR), whether you have it in stock, the price you offer, the delivery time and the number of reviews. If any of these fails, even the best keywords will not help.
How Amazon search works (A9 / A10)
When a user types “jug blender”, Amazon does not show results at random. First it checks which products contain those keywords in titles, descriptions and attributes. Then it analyses sales data: whether users click these offers and whether they actually buy.
If your product page is relevant, well written and sells regularly, Amazon will start showing it higher in the results. In short: the more customers like it, the more the algorithm likes it.
Where to place keywords
Every listing element matters, and the algorithm gives them different weights.
The most important is the title: it is the first thing the user sees and what the system analyses. It should be specific, contain the main phrase and the product’s key features. For example: KELMO Jug Blender 1200 W – 1.5 l glass jug, 3 speeds, black
One sentence that clearly says what it is, who it is for and why it is worth it is enough. Avoid unnatural keyword “stuffing”: Amazon does not like that style. Better to write shorter, but naturally and invitingly.
The next important element is the bullet points (Key Product Features). These are five short paragraphs where you explain why your product is better than others. Each point should follow a logical sequence: feature → benefit → use.
1200 W motor: blends hard vegetables and ice in seconds. 1.5 l glass jug: resistant to odours and high temperatures, dishwasher-safe. 3 speeds + pulse function: full control over smoothie consistency.
Below is the Product Description: the place to develop the product’s story, show its uses and add secondary phrases.
Remember that customers do not read descriptions like articles: they scan the text. Use short sentences, paragraph breaks and bold for the most important information.
At the end you have the backend keywords: keywords invisible to buyers but important for the algorithm. This is the perfect place for synonyms, colloquial terms, misspellings or local variants.
Example: smoothie blender jug blender cocktail mixer blender 1200w glass blender
Amazon treats these words like “secret passwords”: thanks to them you can appear in the results even if the phrases do not occur in the title.
How to find good keywords
You do not need to be an SEO specialist to do effective research. A few simple steps are enough.
First, check what Amazon itself suggests
Type the product name into search, e.g. “blender”, and see which phrases the system adds automatically. These are real customer queries: it pays to write them down.
Then analyse the competition
Open a few of the best-selling offers in your category and note which words appear in the titles, bullet points and descriptions. Do not copy them, but treat them as inspiration.
If you want to go a step further, use tools such as:
- Helium 10: you will find the most searched phrases and check which keywords competitors’ offers are visible for (the “reverse ASIN” function).
- Jungle Scout: it shows additional phrases and their seasonality, i.e. in which months they are searched most.
It also pays to review the reports from your own ad campaigns (Search Term Report). Words that already bring sales from advertising can be added to titles and descriptions.
Once you have a ready list of phrases, organise it:
- the most important (for the title and bullets),
- secondary (for the description),
- additional (for the backend).
How to combine SEO with UX (user experience)
Good SEO on Amazon is not only search visibility. It is also readability and trust, because a human ultimately clicks “Buy now”.
So keep the simple rules in mind:
- the title should be understandable, not overloaded,
- the main photo must be clear, without background or text,
- the bullet points should be short and specific,
- the description should help the buying decision, not repeat the content above,
- leave the backend keywords for things that would spoil readability (synonyms, misspellings, other languages).
This way your product page will be readable both for the customer and for the algorithm. A good test is a simple question: Does this text sound like something I would buy myself?
How AI can help with optimization
More and more sellers use AI to speed up the offer creation process. The point is not for artificial intelligence to write everything for you, but to help you reach the result faster.
AI can:
- generate several title versions and help pick the best,
- rewrite bullet points so they sound natural and encourage buying,
- suggest a keyword list based on competitors’ offers,
- check the text length and formatting correctness,
- translate content into other languages while keeping the sales tone.
Tools that work great here include:
- ChatGPT: for writing and editing content,
- Helium 10: for phrase and SEO analysis,
- Google Sheets with a GPT add-on: for bulk generation of data (e.g. titles, descriptions, backend keywords),
- DeepL Write: for natural translations into EU languages.
An example prompt you can use: Prepare a title, 5 bullet points and a short description for the product: KELMO Jug Blender 1200 W, 1.5 l jug, 3 speeds, black. Include the phrases: smoothie blender, jug mixer, blender 1200w. Write simply, clearly and in English.
AI will not replace your product knowledge, but it will help you write faster, more clearly and more precisely.
Amazon SEO optimization is not magic: it is consistency and logic. Good keywords in the right places, clear language, a transparent structure and attention to detail are the foundations of an effective listing. Amazon rewards not those who write the most, but those who write the best. Combine knowledge of your product with a technical approach to SEO, and treat AI as support that helps you reach the result faster. Then your listing will not only be visible, but above all it will sell.

A+ Content and Brand Store: how to strengthen the offer visually and textually
Once a customer lands on your listing, the most important moment begins: whether they stay and buy or move on. This is exactly where A+ Content and the Brand Store play a huge role: two tools that let you turn an ordinary product page into a professional brand page.
This is not just decoration. Well-prepared A+ Content can increase conversion by as much as 5–10%, because it removes doubts, builds trust and helps the customer imagine the product in use.
What A+ Content is
A+ Content (formerly Enhanced Brand Content) is a section under the product description where you can add photos, graphics, tables, comparisons and brand storytelling. This makes your listing start to look like a product page in an online store rather than another anonymous offer.
To use A+ Content you must have a brand registered in the Amazon Brand Registry programme. It is a free process (for brand owners) confirming that you are the official manufacturer or owner of the rights to the name. After activation you gain access not only to A+ but also to the Brand Store, Brand Analytics and brand protection tools.
A+ Content is your place to tell the product’s story. Here it is no longer only about keywords, but about building an emotional bridge between the brand and the customer. Show the benefits, the context of use, the story or the values behind your product.
How to create effective A+ Content
The most important thing is for A+ Content to be readable and visually orderly. The customer does not want to see chaos: they want to understand how your product differs from others.
Well-designed A+ Content should contain:
- A headline with the key benefit: one sentence saying why it is worth it. “Durability you can count on every day.”
- A section with icons or graphics: showing 3–5 main advantages. Durable material | Easy assembly | Waterproof | 2-year warranty
- Context (lifestyle) photos: the product in use: in the kitchen, garden, car.
- A variant comparison: a table with the differences between your models (e.g. size, capacity, colour).
- A short brand story: a few sentences about what sets you apart.
Remember that A+ Content does not directly affect Amazon SEO, but significantly increases the time spent on the page and the conversion rate (CR). And that indirectly raises your position in search results.
Brand Store: your own mini-site on Amazon
If A+ Content is a better product page, then the Brand Store is your own store within the Amazon ecosystem. It is a free (if you have a Professional selling account), dedicated space where you can present your whole product collection, add banners, video, themed subpages and links between products.
The Brand Store is also a way to build a consistent image. A customer who lands in your store sees that a real brand stands behind the offer, not a random seller. You can drive ads to it (Sponsored Brands, Sponsored Display) and track how users move around your pages.
A well-designed Brand Store:
- has a clear category structure,
- shows products in a consistent photo style,
- tells the brand story,
- lets the customer “immerse” themselves in the product world.
This solution is especially important in industries where design, style and emotion matter a lot, such as home decor, beauty, fashion or outdoor.
How AI can help create A+ Content and a Brand Store
Artificial intelligence can now speed up the whole process of creating content and product visualisations. It is not about generating ready texts on autopilot, but about tools that help refine details and turn ideas into professional materials.
AI can:
- suggest the structure of A+ sections (e.g. the order of benefits, headline length, division into modules),
- help write short, simple descriptions that sound natural,
- generate alternative versions of slogans that better convey your brand’s tone,
- and above all, create photos and visualisations in any context.
Here Imagen 4 Ultra comes to the rescue: an advanced tool from Google Gemini that handles photorealistic product rendering superbly.
With it you can:
- generate realistic product photos from different angles,
- place it in a natural setting (kitchen, garden, office, beach),
- create seasonal or campaign shots without costly photo sessions,
- match the photo style to the brand identity.
You can, for example, upload a photo of the product on a white background, and Imagen 4 Ultra will place it in a completely new context: in the user’s hands, in a room, on a table or in a lifestyle setting. Only your imagination limits you.
In practice it works like this:
- you prepare a few product photos (or one main one),
- AI generates new shots from different angles, in natural lighting and realistic proportions,
- you choose those that best fit your A+ Content or Brand Store.
With such tools you can create a consistent visual brand story in a few hours: something that until recently required the work of a designer, photographer and studio.
A+ Content and the Brand Store are not embellishments: they are strategic sales tools. They let you show the product in context, build trust and increase conversion. It is the place where the customer sees not only what you sell, but why it is worth choosing you.
Today, thanks to AI tools such as ChatGPT, DeepL Write or Imagen 4 Ultra, creating professional visual materials and descriptions is easier than ever. You no longer need a whole creative team: an idea, a few photos and imagination are enough. And Amazon… rewards those who can put that imagination to good use.
The most common product listing mistakes
Everyone who sells on Amazon made mistakes at the start. That is normal: the platform is huge, the rules change often and the number of fields to fill in can be overwhelming.
The good news? Most of these mistakes can be avoided if you know what to look for. We have gathered the ones that appear most often, from small oversights to things that can kill sales in a few days.
1. Wrong category or missing key data
This is the most common problem among beginners. Amazon has thousands of subcategories, and if you choose the wrong one, your product simply will not appear where the customer looks for it.
Example: you sell a drawer organiser but put it in the “Kitchen Accessories” category instead of “Drawer Organizers”. The result? A customer filtering by “drawer organiser” will never see you.
Missing key data works similarly: size, colour, material, compatibility. Amazon relies on filters: if you do not fill in the attributes, your product will fall out of the search results, even if the title and description are perfect.
💡 How to avoid it: before you add a product, check the 3–5 best-selling offers in the same category. See how they are classified and which fields they have filled in. Treat it as a model.
2. Duplicate or wrong ASINs
Amazon does not like duplicates. If you try to list a product that already exists in the catalogue, the system will ask you to join the existing ASIN instead of creating a new one. Creating duplicates can result in a blocked offer or even the whole account.
On the other hand, a wrong ASIN (i.e. linking the product to a non-matching page) is a recipe for disaster: your photos and descriptions land under someone else’s product, and customers start reporting “product not as described”.
💡 Tip: before you list a new product, paste its EAN or title into Amazon search. If an identical offer already exists, it is better to join it, or prepare a new ASIN only when your product really differs (e.g. a different variant, brand, colour).
3. Poor photos or non-compliant with the guidelines
Photos are to Amazon what a shop window is to a store. The customer decides to click based on the first impression, and that is built by the thumbnail.
The most common mistakes:
- a main photo with a background or shadow,
- the product not filling the whole frame,
- too dark or blurry a photo,
- text, a logo or graphics on the thumbnail (Amazon blocks this),
- no shots from different angles.
Amazon recommends photos of at least 1000 × 1000 px (ideally 2000 px) in JPG format. The main photo must be on a clean, white background (#FFFFFF) and show the whole product.
It also pays to add a few lifestyle photos: the product in use, in the context of everyday life. Those convince emotionally.
💡 Pro tip: you no longer need a full photo session to get a great effect. Imagen 4 Ultra, an AI tool, can faithfully render the product and place it in any setting. One base photo (e.g. the product on a white background) is enough, and Imagen 4 Ultra will create photorealistic shots from different angles: in the kitchen, living room, office or garden.
You can show the product in a seasonal context, with accessories, in different arrangements: only your imagination limits you. It is the perfect solution for A+ Content and the Brand Store, but also for thumbnails and the listing photo gallery.
4. A meaningless title, either too long or too short
The title is the most important SEO element and the customer’s first contact with your offer. Too short and it does not explain what you sell. Too long and it loses readability and puts people off. Too “technical” and it sounds artificial.
A good title balances SEO and clarity. A simple layout is enough: Brand + Product type + Key feature + Variant (colour, size).
Amazon recommends the title not exceed 200 characters, but it is best to stick to 150–170: then it displays in full on desktop and mobile.
5. No backend keywords
This is a section many sellers forget. Backend keywords are not visible to the customer, but they have a huge impact on where your offer appears. It is there you can add synonyms, colloquial names, misspellings and local terms that cannot be woven naturally into the title or description.
💡 Example: for “travel backpack” it pays to add in the backend: travel bag cabin bag trekking backpack 40x20x25 backpack carry-on.
Amazon does not need commas: spaces are enough. Also do not repeat phrases from the title or bullets, as that wastes space.
6. No translations or ill-considered localization
If you sell in several countries (e.g. DE, FR, IT, ES), automatic translation is not enough. Customers in different countries use different words: sometimes a small difference decides visibility. For example, in Germany “Rucksack” is popular, but customers also search for “Trekkingrucksack” or “Handgepäck Rucksack”.
💡 Solution: use contextual translation, e.g. DeepL Write, which keeps the marketing sense and tone of the language. A well-translated listing can increase sales by as much as 20–30%.
7. Too generic or unreadable bullet points
A very common mistake: five points that look identical and say nothing. Instead of “High material quality”, write:
Durable 18/10 stainless steel: rust-resistant and dishwasher-safe.
Each point should answer a real customer question: Does it work? Does it suit me? Is it worth paying this price?
8. No testing or analysis after publishing
Many sellers publish a listing and… forget about it. Yet Amazon is constantly changing: the algorithm, the competition, seasonality. What worked in May may not work in November.
Regularly check the statistics in Seller Central (the Business Reports tab). If you see a drop in impressions, the title and main photo may need improving. If there is traffic but conversion is falling, work on the bullets, description or price. Amazon also lets you run A/B tests (Manage Your Experiments): you can check which version of the title or photo converts better.
Most mistakes on Amazon come not from bad intentions but from haste. The point is not to do everything perfectly at once, but to know what to pay attention to and improve your listings systematically. Good photos, a clear title, complete data and thought-through keywords are the four pillars of an effective product. Add A+ Content, a Brand Store and a bit of creativity (supported by AI), and your offers will not only look professional but also start selling on their own.
How to measure the offer’s effectiveness
Listing a product is only the beginning. Real results appear only when you start tracking data: checking what works and what needs improving. Amazon provides plenty of metrics that tell you about your listings’ effectiveness: from the number of clicks to conversion and Buy Box share. It pays to know them better so you do not operate blindly.
CTR: how many customers click your offer
CTR (Click-Through Rate) shows how often customers click your product after seeing it in the search results. A low CTR is a signal that something is not catching attention: the photo, title or price.
The most common causes of a low CTR:
- the main photo does not stand out from the competition,
- the title does not contain key phrases,
- few reviews or a poor rating (below 4★).
💡 How to check it: in Seller Central go to Reports → Business Reports → Detail Page Sales and Traffic by Child Item. Compare the Impressions and Sessions data to see which products actually attract attention.
CR: conversion, i.e. how many buy after entering
Conversion Rate (CR) shows how many users buy the product after entering the page. A high conversion means the description, photos and reviews work: the customer is sure it is worth it. A low one means something needs refining.
The most common reasons for low conversion:
- an unclear description or missing information,
- too few context photos,
- no distinguishing feature (the product looks like hundreds of others),
- a high price or long delivery time.
💡 Where to check it: in the Business Reports report you will find the Unit Session Percentage column: that is the conversion rate.
Buy Box: who really sells
The Buy Box is the most important place on the product page: most purchases happen right there. Amazon chooses which seller holds it at a given moment based on, among other things, price, fulfilment method (FBA/FBM), availability and service quality.
If your Buy Box share is low, it is a sign that the competition offers better conditions: it pays to compare shipping time, service level and pricing policy.
💡 How to monitor it: in Business Reports check the Buy Box Percentage column to see which products lose it most often.
Reviews and ratings: the trust factor
Reviews are not only an image element but one of the main factors affecting conversion. Products rated above 4.3★ sell many times better than those without reviews. It pays to use the Request a Review button regularly and analyse customer comments: it is a free form of feedback.
Analysing traffic, position and sales
The Seller Central data alone is only the beginning. To really understand how your listing works and where you lose sales, it pays to use external analytics tools.
🔹 Sales analysis and reporting tools:
- Helium 10: the most popular toolset for analysing SEO, sales, keyword positions and market share. It lets you track the competition, trends and PPC campaign results.
- Jungle Scout: ideal for analysing product potential and monitoring margins, rankings and ad costs.
- Sellerboard: great for profit and cost analysis (P&L); it shows the real profit after accounting for Amazon fees, ads and logistics.
- DataHawk: comprehensive sales, advertising and ranking analytics, very popular among agencies.
- Nozzle: a tool for tracking keyword visibility, positions and organic results (Amazon SEO).
- Keepa: price, sales and availability history; ideal for monitoring the competition.
- Perpetua / Quartile: for the more advanced; analytics and automation of Amazon PPC campaigns.
🔹 Tools available in Amazon itself:
- Business Reports: basic data on traffic, conversion and sales for each SKU.
- Brand Analytics: analysis of keywords, search share and buyer behaviour (available after brand registration).
- Manage Your Experiments: lets you test titles, photos and A+ Content (A/B tests).
How AI can help analyse offer effectiveness
Artificial intelligence will not replace experience, but it can significantly speed up analysis and discover patterns not visible at first glance. With integrations and AI tools you can:
- automatically generate reports from Seller Central,
- identify products with the lowest conversion or CTR,
- analyse titles and photos for attractiveness,
- suggest changes that can improve sales results.
For this you can use:
- ChatGPT / Gemini: for interpreting reports and comparing offers,
- GPT for Sheets: for automatic data analysis in spreadsheets (e.g. detecting anomalies, creating recommendations),
- Helium 10 + AI Assist: for analysing listings, trends and competitors,
- Imagen 4 Ultra: for testing different photo versions (e.g. changing the background, angle, context of use) and checking which best affect CTR.
In practice this means that instead of hours of manual work, you can get a report in a few minutes showing where your product loses customers and what you can improve.
Well-chosen tools and regular results analysis are the foundation of effective selling. Amazon rewards offers that not only look good but above all convert, and that cannot be judged without data.
FAQ: the most common questions about selling and optimizing offers on Amazon
Before you list your first product or start optimizing your offers, plenty of questions arise. Do you need an EAN code? How does Amazon SEO (A9) work? How many photos should you add? What to do when sales suddenly drop?
We have gathered in one place the most common questions asked by both beginner sellers and those who already have an active Amazon account. You will find short, concrete answers and tips on which tools to use to operate effectively, from Helium 10 and Sellerboard to Imagen 4 Ultra for product photos.
How to list a product on Amazon step by step?
To list a product on Amazon, log in to Seller Central and go to Inventory → Add a Product. You can add a new product or join an existing ASIN. Prepare the data: title, description, photos, price, EAN code and category. After approval Amazon verifies the listing and the product appears in the catalogue. ➡️ It pays to take care of keywords and photos right away: they have the biggest impact on visibility.
Can you sell on Amazon without an EAN?
Yes, you can, but only if you have your own brand. Then you apply for a GTIN Exemption in Seller Central and attach photos of the product and packaging. For branded products (e.g. Lego, Philips) an EAN is mandatory. Without it Amazon will not link the product to the catalogue.
How does SEO on Amazon (A9 / A10) work?
The Amazon algorithm (A9/A10) analyses two factors:
- relevance: keywords in the title, bullets, description and backend keywords,
- performance: CTR, conversion, ratings, price, availability. The better your product sells after a click, the higher Amazon displays it. SEO on Amazon is not just words: it is the whole quality of the offer.
How to choose keywords for an Amazon offer?
It is best to use tools such as Helium 10, Jungle Scout or DataHawk. Type in the main phrase (e.g. “thermal mug”) and you will see a list of similar queries and their popularity. Well-chosen phrases should be added to:
- the title (main words),
- the bullets (supporting phrases),
- the backend keywords (synonyms and local variants).
How to add A+ Content on Amazon?
To add A+ Content you must have a brand registered in the Amazon Brand Registry. Then go to Brands → A+ Content Manager → Create A+ Content. Add photos, texts and graphics, then assign the content to the product (ASIN). Approval usually takes 1–2 days. A+ Content does not directly affect SEO, but significantly raises conversion (CR).
How to improve conversion on Amazon?
Take care of four key elements:
- Photos: the first one decides the click.
- Description: simple, concrete, benefit-focused.
- Reviews: the more positive, the greater the trust.
- Price and availability: a Prime product wins the Buy Box more often.
Tools that help with analysis: Sellerboard, Helium 10, DataHawk and Manage Your Experiments (A/B tests).
How to measure offer effectiveness on Amazon?
The most important metrics are:
- CTR (Click-Through Rate): how many customers click the offer,
- CR (Conversion Rate): how many buy after entering,
- Buy Box %: how often your product wins the sale,
- Reviews and rating: they affect trust and position. You will find the data in Reports → Business Reports in Seller Central. Regular monitoring is the basis of optimization.
Which tools help analyse Amazon sales?
The most commonly used:
- Helium 10: keywords, SEO, competition, trends,
- Sellerboard: profit and cost analysis,
- Jungle Scout: sales potential and volume,
- Keepa: price and availability history,
- DataHawk: sales and ranking reports,
- Perpetua / Quartile: analytics and PPC campaign automation. All integrate with the Amazon account, so you see real data in real time.
Which photos work best on Amazon?
Ideally 7–8 photos: the main one — the product on a white background; 2–4 — lifestyle (in use, in context); 5–6 — details, functions, infographics; 7 — a brand or set photo. More and more brands use Imagen 4 Ultra to create realistic shots without costly photo sessions. AI faithfully renders the product and lets you show it from different angles: in the kitchen, living room, garden.
Is it worth using AI when optimizing Amazon offers?
Yes: AI can significantly speed up the optimization process. The most commonly used tools are:
- ChatGPT / Gemini: for writing titles and descriptions,
- Helium 10 + AI Assist: for phrase and competitor analysis,
- DeepL Write: for offer translations,
- Imagen 4 Ultra: for generating photos and product visualisations. AI helps increase CTR and conversion without the need for large budgets.
How long until an offer starts selling?
Usually the first results appear after 1–2 weeks. Amazon needs time to gather CTR and conversion data. Optimization (SEO, photos, reviews, A+) brings full effects after 30–60 days. Regular tests and small improvements give the best results.
How to increase product visibility in AI (ChatGPT, Perplexity)?
AI increasingly draws data from product descriptions and brand content. To increase the chance that your products are cited or recommended:
- take care of unique, thorough descriptions,
- use precise data (materials, dimensions, use),
- run a blog or expert articles (e.g. on the brand site or Amazonway),
- add descriptive phrases like “ideal for…”, “best for…”,
- use FAQ formats: LLMs love them.
That is exactly why Amazonway develops brand ranking services in LLMs: so that brands are visible not only in Google but also in AI conversations.
Why is it worth running a Brand Store on Amazon?
The Brand Store is your mini-site within the Amazon ecosystem. It lets you present a product collection, the brand story and drive traffic from ads. It increases time spent on the page and supports conversion. The best results come from stores with polished photos, A+ Content and a consistent visual message.
How to check whether Amazon indexes my offers well?
Go to Seller Central → Inventory → Search Suppressed and Inactive Listings. You will see a list of products that have been hidden or are not visible in the search results. The cause may be a missing photo, technical data or an incorrect category. It also pays to check keyword indexing in the Helium 10 Keyword Tracker.
Do you need to translate offers when selling across Europe?
Yes. Amazon automatically translates listings, but these translations are often imprecise. For markets such as DE, FR or IT it is better to use DeepL Write or a translator experienced in eCommerce. A well-translated description increases conversion by as much as 20–30%.
How to check which products have the greatest sales potential?
Regularly analyse:
- CTR (do customers click),
- conversion (do they buy),
- Buy Box %,
- ratings and reviews. Combine this data in Sellerboard or DataHawk: you will quickly see which products “carry the sales” and which need improving.
What to do if sales suddenly drop?
Check in turn:
- whether you have an active Buy Box,
- whether the competition’s price has changed,
- whether stock has run out (FBA),
- whether the product has lost visibility (a CTR drop),
- whether negative reviews have appeared. If needed, update the photos, title or descriptions: small changes are often enough to reverse the trend.
All chapters of the guide
- Start: the complete step-by-step guide
- How to set up an Amazon Seller account and choose a plan
- Amazon logistics models: FBA, FBM, EFN and Pan-EU
- Amazon taxes in Europe: VAT, OSS and EPR obligations
- How to list a product and optimize your offer
- Amazon SEO and keyword research: keywords that sell
- Amazon advertising: Amazon Ads and PPC (full guide)
- Launch scenarios: from zero to a mature business
- FAQ: the most common Amazon selling questions